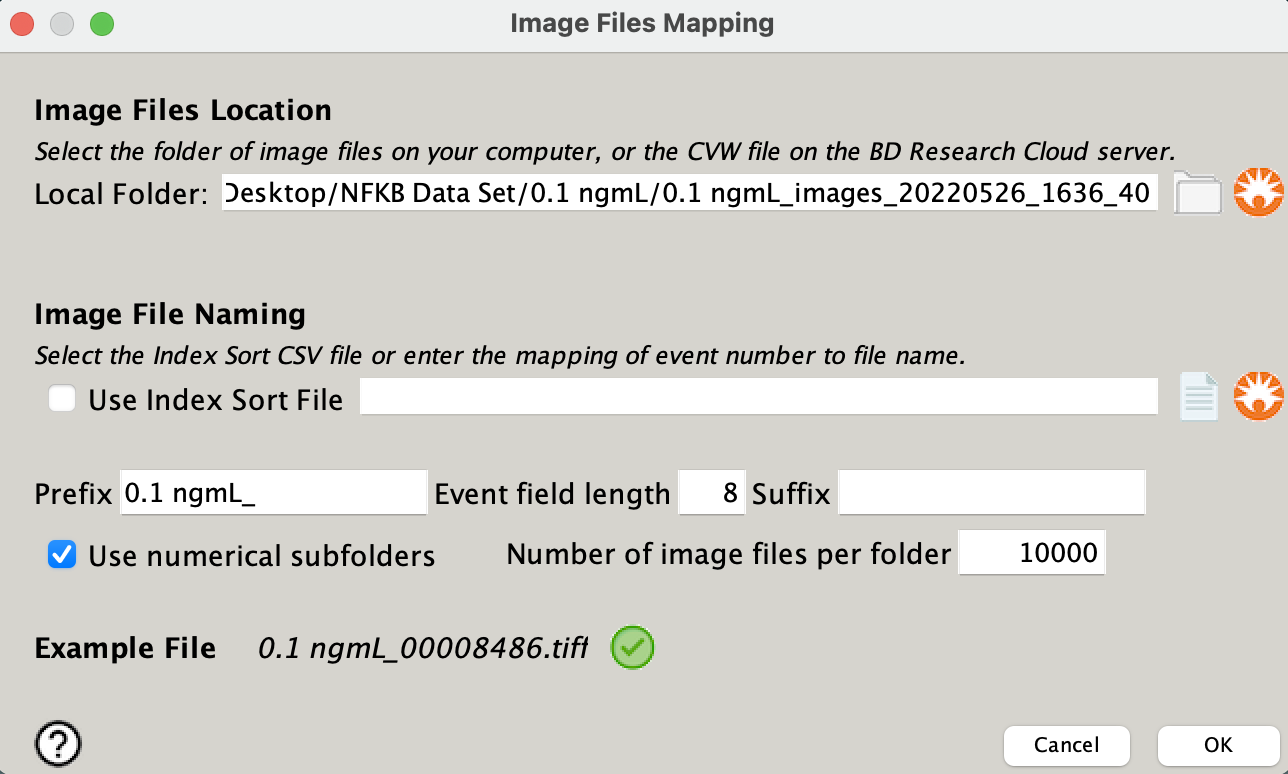
The CellView Lens mapping dialogue allows the user to point to a folder of images to connect them with the associated files.
When the first plugin node is created for a sample’s population, the new plugin node must determine the root folder where image files are located and be able to map an event number to an image file name. When first created, the plugin node will attempt to find the image folder and file name mapping based on the location of the FCS file. Typically the image files are organized into numerical subfolders (e.g. ‘00000000’, ‘00010000’, etc) where 10,000 images files are located in each subfolder.
NOTE: To generate the folders containing the images, you must first convert the exported image event
data that was recorded in Chorwave format (CVW) to TIFF (Tagged Image File Format) by using the BD CellView™ Image Extractor. To know more about BD CellView™ Image Extractor, see the Extracting images section in BD FACSDiscover™ S8 Cell Sorter with BD CellView™ Image Technology User’s Guide.
After mapping the image files to events, you can either confirm or change the root folder of image files and the name mapping information. If the file name prefix, suffix, and event number length are correct, the plugin displays a confirmation that an image file is correctly found. If not, you can enter the prefix and
suffix values manually until the image file name is confirmed.

If you want to analyze images from the BD® Research Cloud, click the BD Logo icon.
If the folder and prefix are correct, a green check mark will appear next to the example file.
