CHAPTER 2 – Creating a FlowJo compensation matrix from single stain controls
back to Compensation Workflow Overview
Before compensating data in FlowJo, be sure your parameters which require compensation are scaled correctly.
Compensation has been reworked for version 10. Compensation controls (single stain samples) must now belong to a compensation group in order to create a compensation matrix with these controls. There is a single compensation matrix in the workspace by default and it will allow you to create one new compensation matrix in FlowJo. If you require multiple new compensation matrices, simply create a new group and assign it a role of ‘compensation’. One compensation group will yield one compensation matrix from the controls provided to that group. Only put the controls necessary for creating that compensation matrix in this compensation matrix. Otherwise, the compensation interface will not process the controls correctly.
1) To initiate creating a new compensation matrix in FlowJo, select the compensation group in the workspace and go to the Workspace ribbon.

2) Click the compensation icon in the Cytometry band of the Tools tab.

3) The compensation interface will launch. An overview of this window is here.
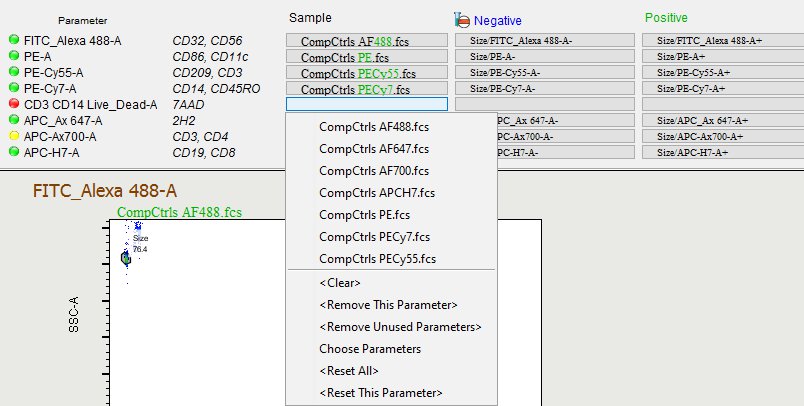
4) FlowJo will attempt to assign the correct samples to each parameter. A colored dot will appear next to the file name indicating the likelihood that FlowJo found the correct compensation file. Green indicates a good match, yellow is less certain, and red indicates a poor or non-existent control file is associated the compensation parameter. As you can see from the picture below, the CD3-7AAD parameter and APC 647 require adjustment.

5) You can use the assignment text at the top of the window to clear sample assignments if they are incorrect.

You can also use this menu to add additional parameter options (if they were missed by the compensation editor) or to remove parameter options that may be complicating the interface.
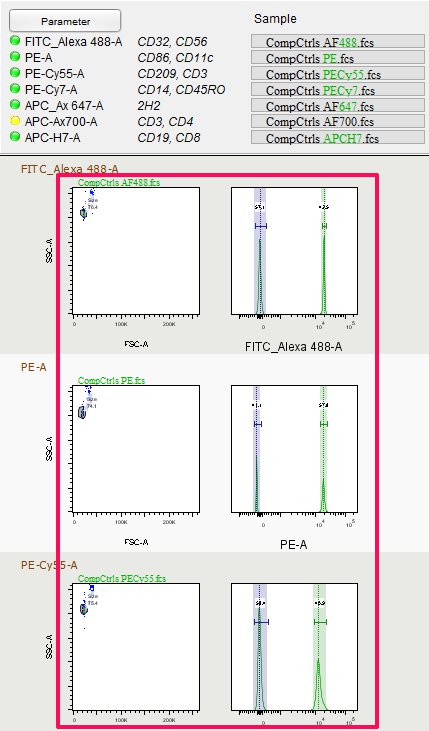
6) To adjust any gates, the bottom portion of the window provides a list of each parameter, with graphs of gates created by FlowJo for scatter and positive/negative populations for each single stain control. 3 of the 7 gated and compensated parameters are shown below, highlighted by the red box.

7) Double click on a graph to edit a gate location. When you double click, the graph window will open and all you to adjust the location of the gates.

*The compensation algorithm determines gate locations empirically based on fluorescence. In most cases, these gates settings will be optimized. However, if there is a noticeable problem, manually alter the gate position. Also, there are rules regarding the positive population – it must contain more than 100 events and be 2% or greater of the parent population. If the positive gate contains less than 2%, try setting a parent (preceding) gate to ensure that your positive gate meets or exceeds 2%.
8) You can also create your own gates in the graph window and use the text assignment windows, within the compensation editor, under the negative and positive columns in the top portion of the compensation interface to assign these newly created gates.

9) Please name the compensation matrix. The default matrix name will be “Compensation”.

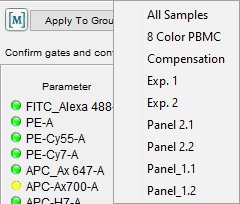
10) Use the “Apply to Groups” button to assign it to a group of samples or drag the matrix element  to a single sample.

11. Once assigned, a new compensation node will appear next to the samples with the name and color of this new FlowJo compensation matrix.
*If you have any trouble, please email: techsupport@flowjo.com
Tags: FlowJo